Method:
Step 1
First, preheat your oven to 180C/160C fan/Gas 4. Grease a muffin tin (as I have used), a cupcake tin or little tart tins with plenty of butter.
Step 2
Make the pastry. Into a large bowl, weigh your flour. Add your cold butter, chopped up, and then rub the two together using your fingers. You want to take handfuls at a time, then rub your thumbs down the rest of your fingers, combining the butter and flour as you do so. Keep going until you have breadcrumbs.
Step 3
Add your water, then mix together using a butter knife (or other blunt instrument). Once the water has been absorbed, use your hands to bring the pastry together into one big lump. Work it if need be, but don’t add any more water. Wrap this in cling film and place in the fridge for at least 15 minutes, but up to 3 days.
Step 4
Unwrap your cold pastry onto a floured surface. Add more flour on top, then roll it out until it is the thickness of a £1 coin. Keep the pastry moving to stop it sticking, and keep everything well floured. Use a cutter or a bowl to cut out appropriately sized rounds of pastry, and tuck these into your tins.
Step 5
Keeping going until you have 12; re-rolling is absolutely fine. Prick all your wee cases with a fork – this should stop them rising – then place in your oven. Check them after 10 minutes, pushing down any bubbles that have formed. Then, bake for another 15 minutes, or until a light golden brown.
Step 6
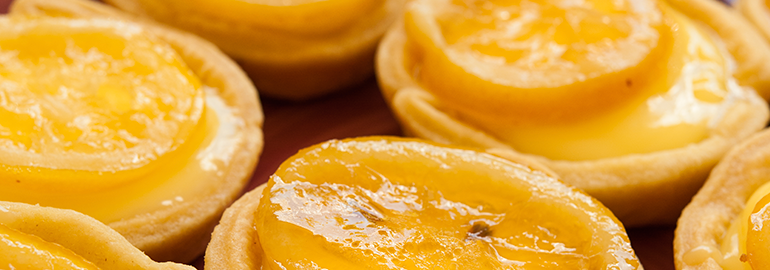
Whilst your tarts are cooling, make your filling and topping. In one saucepan, place your cream and sugar. Bring it to a simmer over a medium heat, then keep simmering for about 5 minutes. Give it a stir to stop it burning. Then, remove it from the heat and stir in your lemon juice. This is now ready – you can pour it into your tart shells.
Step 7
In another saucepan, place your sliced lemon. Cover them in 4-5 tablespoons of sugar, then cover with water. Place this on a medium-high heat and boil for 10 minutes or so, until the skins of the lemons have gone glossy. These can be placed on top of your assembled tarts at any point. Your tarts are now ready to serve.
Enjoy!