


Quark Smoothie
The ideal way to incorporate some of your 5 a day. Tangy fruit flavours blend perfectly with the low fat, high protein goodness of Graham’s Quark.


This bread looks, on the face of it, fiendishly difficult to master – but it isn’t!
3 hours
35 minutes
Medium
4
Whenever I do a bread course or demonstration, I always try to fit in fougasse somewhere. It’s a bread that looks, on the face of it, fiendishly difficult to master. But it isn’t – it’s actually one of the easiest of the lot to make well and look stunning. There’s no kneading and no tricky shaping. Think of it like a French version of a focaccia. The shape is supposed to resemble an ear of wheat, but you can do with it what you will; like focaccia, it looks pretty good any shape. The more rustic the better. And like focaccia, it does well smothered in other delicious things, cheeses and meats especially. There isn’t a loaf out there that’s crustier, so if you’re after a good bread to dip in soups then go for this one. A sandwich bread this is not. And the high crust-bread ratio means the health and weight-loss fanatics out there shouldn’t be put off – a thick crust means more chewing, which means you feel fuller faster. And think of all those calories burned working those jaw muscles. Finally, and most importantly, this is one of the fastest breads to make. There’s no second prove. If you’ve got an electric mixer or enjoy kneading, you can speed it up even more.
First, make the dough. Into a large bowl, weigh out your flour. Then, add your salt and yeast on opposite sides of your bowl, rubbing them gently. This is just to keep the salt from killing the yeast, as it does so in high concentrations.
Add the water, and use a wooden spoon to mix everything together. Once it has formed into a dough, cover your bowl with cling film or a wet tea towel and leave it at room temperature for 30-40 minutes.
After this time, give your dough a prod and a poke and a fold with your hands for 30 seconds or so. It should feel stretchy – this is what a kneaded dough feels like. If you enjoy kneading, you could have replaced this first rest with 10 minutes of going at it. Now, cover again with the cling film and leave the dough at room temperature for an hour to hour and a half.
When your dough is rested (and risen – if not, check your yeast is in date) preheat your oven to 220C/200C fan/Gas 8. Lightly flour a work surface.
Turn your dough out onto the floured surface, then sprinkle a bit more flour on top. Lightly press your dough down. Use the edge of a scraper or spatula to cut your dough in two. To make the shape as in the photograph, press down your dough until it’s about 1cm thick. Use the side of your scraper to cut most of the way down the length of the dough. Then, make 3 angled cuts up each side. These cuts should be all the way through so you see your surface.
After you’ve cut through them, grab each fougasse and spread them out by hand; it should transform into something beautiful. If it doesn’t, don’t worry. It’ll still taste good. Place them on a baking tray – this should be sprinkled with flour, or with semolina for a crispier bottom.
Bake your fougasses for 15-25 minutes, depending on how crusty you like them. You might need to swivel your tray round half way through for even baking. For a truly golden crust, chuck half a cup of water onto the oven floor as you put them in the oven to create steam.
I like to make this dough in the evening, cover the bowl and leave it overnight in the fridge. Then, in the morning, in the time it takes me to preheat my oven, I can divide and shape the dough. The loaves can be baked straight from cold.
The ideal way to incorporate some of your 5 a day. Tangy fruit flavours blend perfectly with the low fat, high protein goodness of Graham’s Quark.
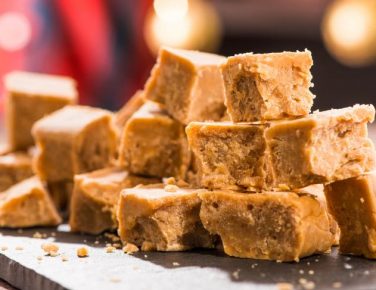
Tablet is a great way to get started with baking: it’s easy, it’s delicious and even if you don’t like it, chances are you know someone who does.

A deliciously, sugar dusted cake. Suitable for kids to cook and adults to eat. For all those budding bakers out there, this is the perfect recipe to start with.